
HOW TO USE THE ORDERS SECTION #
Main sections : #
- The Orders page is where all orders can be viewed
- The Order Details page where details about an order can be viewed
Main Orders Page: #
- PDF Bill generate/download/delete
- PAY an order
- View order total
- View customer information
- Search by customer name/order #’s/dates
- select and delete in bulk
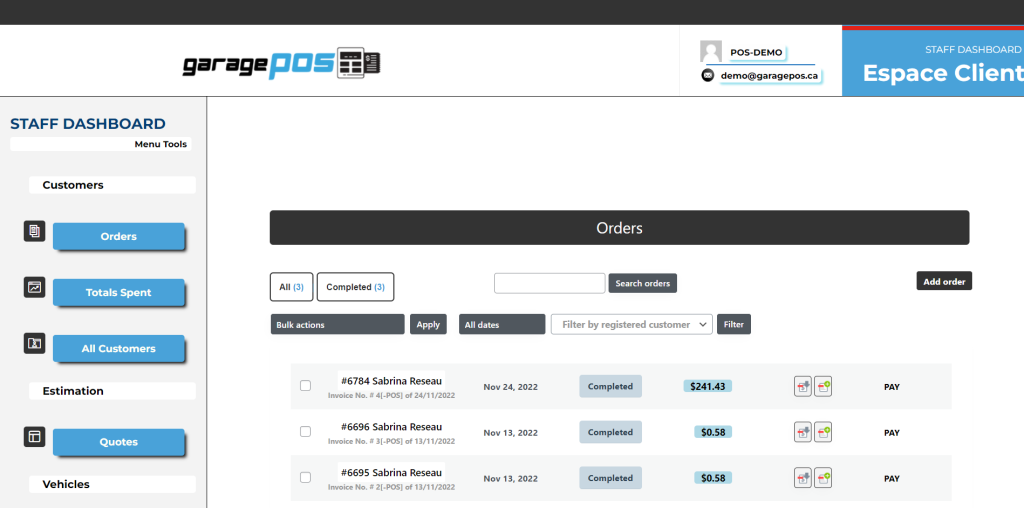
Top left hand section of page will show the Tabs which separate the orders by status type including the amount as well.
Press the box button to the left to first Create the PDF to download near the totals row. Press the button again to download the PDF to your pc to print or send by email.
The button the right would create a shipping invoice and works the same way as the bill PDF.
The PAY button at the end of the row in just another way of SIMULATING as if the customer would be paying through their EspaceClient account and displays the same payment form and page when choosing this method. This is not the same as taking payment directly in the orders details page but both methods will accept payment.
Order Details Page #
Overview #
- Create Order/View Order
- Choose Date/Status/Customer
- ADD VEHICLE to order
- View/Select/Load billing customer information
- Select Product(s) for order
- Take Payment from customer (STRIPE CC PAYMENT)
Create/View Order #
Here you can Create or View an order in detail including all customer information associated with the bill. Just press the Add Order button in Black on the top right in page on either Main or Details Pages.
To attach a customer to an order just select from the customer option drop down by typing the first 3 letters to search for specifics — that customer and their information will auto-populate the order.
Order Status #
The Order Status will automatically change as the order is updated. You can how ever manually change the order status as required.

Vehicle Information #
The Vehicle Information section is very important as it will be attached to the order and will be seen by the customer in their EspaceClient account section.

Add Product(s) #
Select the Product(s) that will be charged on the bill. You can select product by pressing the Add Items button on the left under the order product section.

Once the Add Item(s) button is pressed a new menu will appear and you can now click Add Products(s) to the order.

The Product dropdown menu will display the product (if has already been added to inventory) by typing the first 3 numbers or letters representing the title or SKU of the product you are searching for to add the order.

Take Payment from customer (STRIPE CC PAYMENT) #
Enter the customers payment information by using the payment module integrated within the orders details page. This is all dependent on you also previously configuring your Stripe Account with GaragePOS Stripe Settings. If this was completed, you can press the Charge button to proceed with payment. If the card has an issue it will not be accepted and will return a message.

If payment was successful then it will send an email to your GaragePOS email confirming a new order has been placed. If you have your STRIPE account setup to send you an email as well then you will receive a confirmation letting you know you received a payment fromyour pos system. The payment orders module will now show that payment was successful — you can always add another payment if needed.
The customer receives an email as well letting them know the details about their order including the vehicles information (provided this was entered).


